Deploying Apache Flink Applications in Kubernetes
This guide provides step-by-step instructions for deploying and running Apache Flink applications in a Kubernetes environment. By following these instructions, you’ll establish a complete local development and deployment workflow for Flink streaming applications.
Prerequisites
- Basic familiarity with Kubernetes concepts
- Java Development Kit (JDK) installed
- Maven installed
- Docker installed
Environment Setup
1. Install and Configure Minikube
Begin by installing Minikube on your local machine to create a single-node Kubernetes cluster for development purposes.

2. Install the Flink Kubernetes Operator
Install the Apache Flink Kubernetes Operator as a Custom Resource Definition (CRD). This operator simplifies deploying and managing Flink applications within Kubernetes.
3. Install Kubernetes Dashboard (Optional)
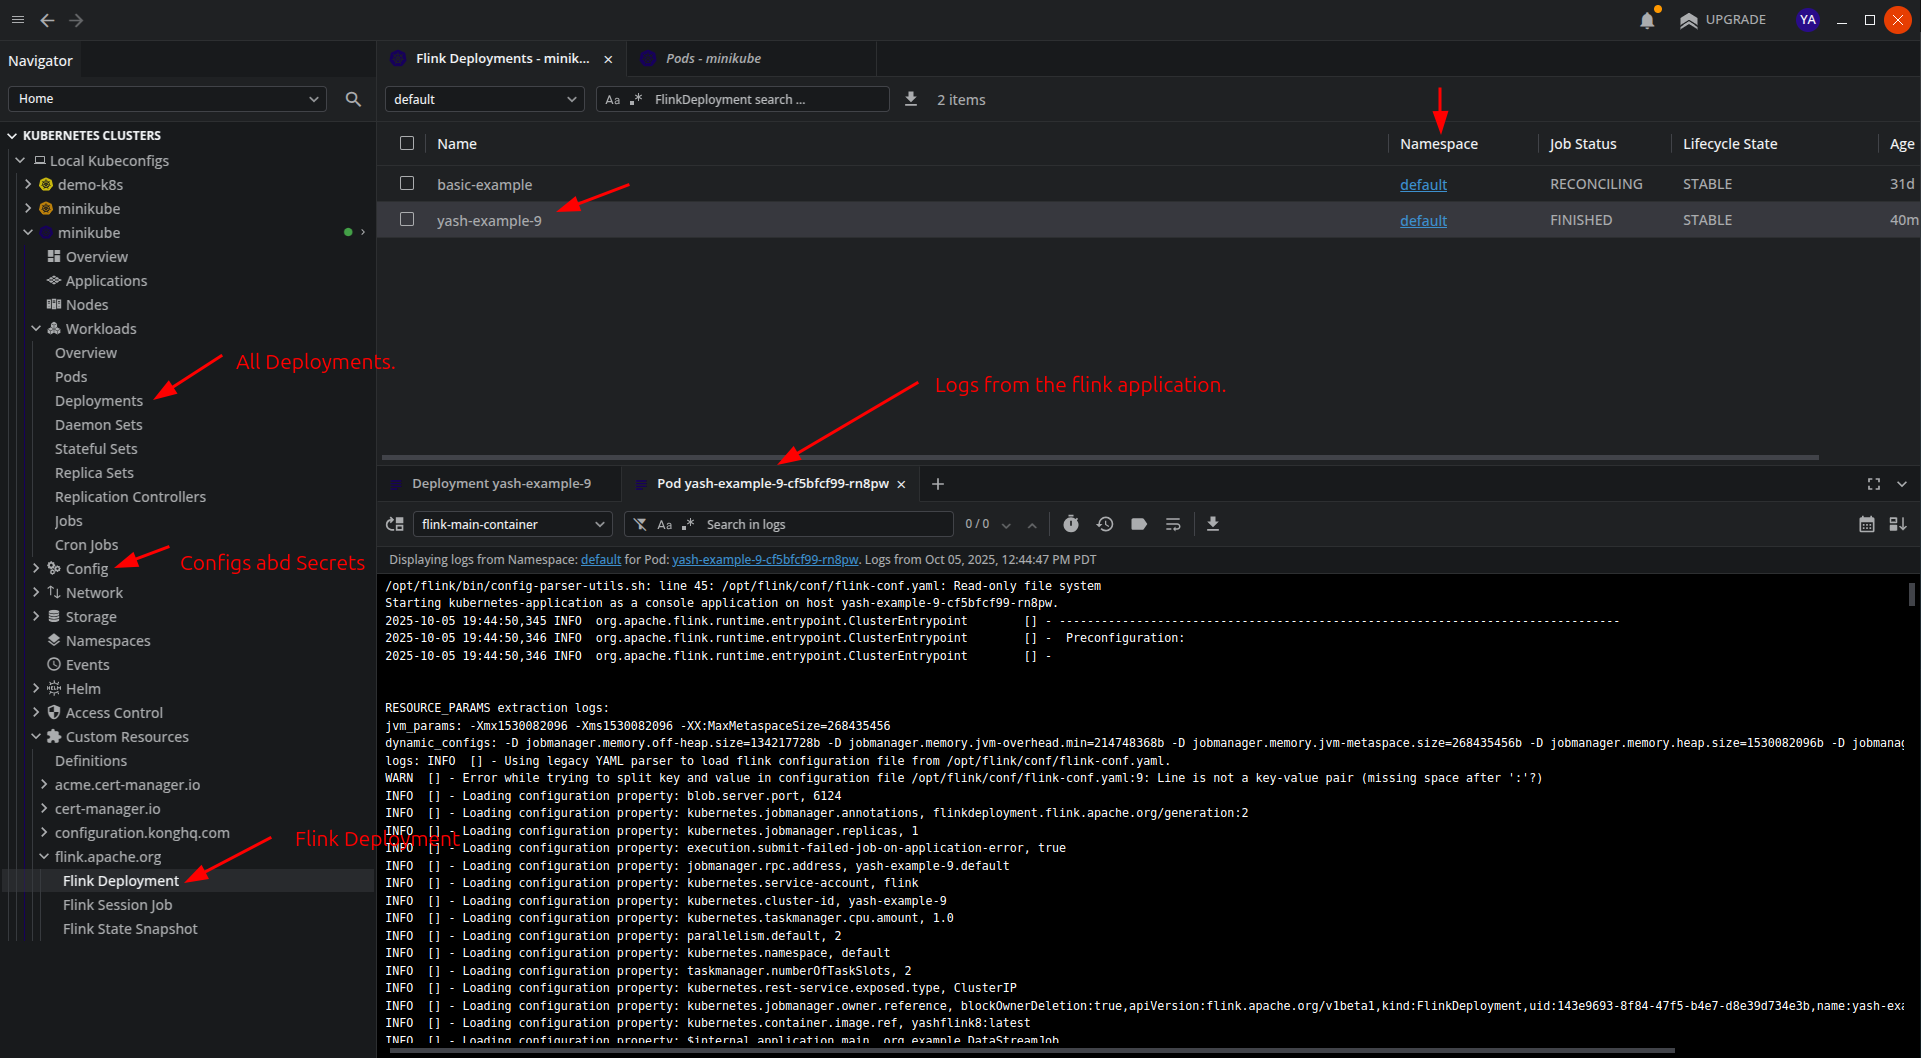
For easier cluster interaction, install Lens Kubernetes Explorer:
lens-desktop &
Deployment Process
1. Start the Kubernetes Cluster
Initialize your local Kubernetes cluster using Minikube.
2. Configure Docker Environment
Run the following command to direct Docker commands to Minikube’s internal Docker environment:
eval $(minikube docker-env)
This essential step allows you to:
- Build Docker images directly inside the Minikube VM
- Use these images in your Kubernetes pods without pushing to an external registry
- Access the same Docker daemon that Kubernetes uses to run containers
3. Build the Flink Application
Compile and package your Flink application using Maven:
mvn clean install
4. Create and Load Docker Image
Create a Dockerfile that includes your application JAR:
FROM flink:1.20
COPY flink-app-0.1.jar /opt/flink/examples/streaming/flink-app-0.1.jar
Build and load the image into Minikube:
docker build -t yashflink8:latest .
minikube image load yashflink8:latest

5. Deploy the Flink Application to Kubernetes
Create a Kubernetes deployment manifest (deployment.yaml):
apiVersion: flink.apache.org/v1beta1
kind: FlinkDeployment
metadata:
  name: yash-example-9
spec:
  image: yashflink8:latest
  flinkVersion: v1_20
  flinkConfiguration:
    taskmanager.numberOfTaskSlots: 2
  serviceAccount: flink
  jobManager:
    resource:
      memory: "2048m"
      cpu: 1
  taskManager:
    resource:
      memory: "2048m"
      cpu: 1
  job:
    jarURI: file:///opt/flink/examples/streaming/flink-app-0.1.jar
    entryClass: org.example.DataStreamJob
    parallelism: 2
    upgradeMode: stateless
Apply the deployment and set up port forwarding to access the Flink Dashboard:
kubectl create -f /home/yash/IdeaProjects/flink-app/src/main/resources/deployment.yaml
kubectl port-forward yash-example-9 8081
6. Monitor the Deployment
Verify that your Flink deployment is created successfully. You can view logs using the Kubernetes UI or the command line:
kubectl logs -f deploy/basic-example

7. Resource Management
When running locally, be mindful of resource constraints. Remove unused applications from the Custom Resources Definition to free up resources:
kubectl delete flinkdeployment yash-example-9
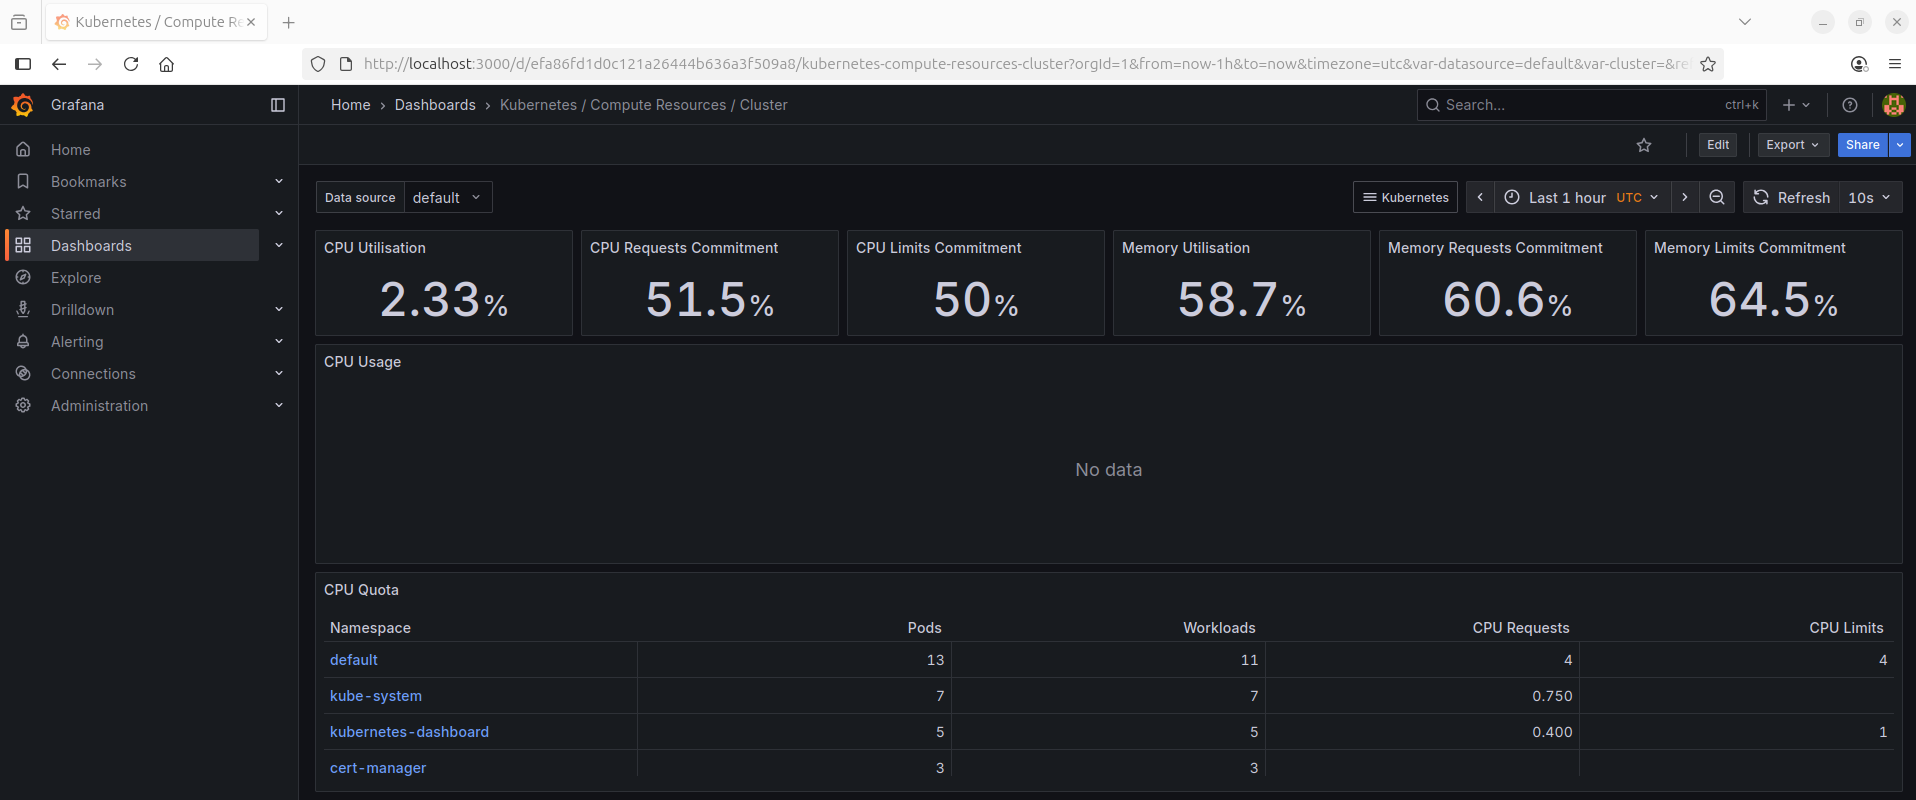
8. Install Prometheus (push based) metrics collector and grafana dashboard.
# Add the Prometheus community Helm repository
helm repo add prometheus-community https://prometheus-community.github.io/helm-charts
helm repo update

# Create a namespace for monitoring
kubectl create namespace monitoring

# Install Prometheus using Helm
helm install prometheus prometheus-community/kube-prometheus-stack --namespace monitoring

# Get the Grafana dashboard http://127.0.0.1:3000 UserName : admin and Password.
kubectl --namespace default get secrets prometheus-grafana -o jsonpath="{.data.admin-password}" | base64 -d ; echo
export POD_NAME=$(kubectl --namespace default get pod -l "app.kubernetes.io/name=grafana,app.kubernetes.io/instance=prometheus" -oname)
# Do port forwarding.
kubectl --namespace default port-forward $POD_NAME 3000

Conclusion
You’ve successfully deployed an Apache Flink application in a Kubernetes environment. This setup enables scalable, container-orchestrated stream processing workflows suitable for both development and production environments.
Troubleshooting
- If you encounter resource constraints, try allocating more resources to Minikube during startup
- Verify that the service account has appropriate permissions
- Check Flink logs for application-specific errors